How to Wire Wrap Sea Glass for Jewelry
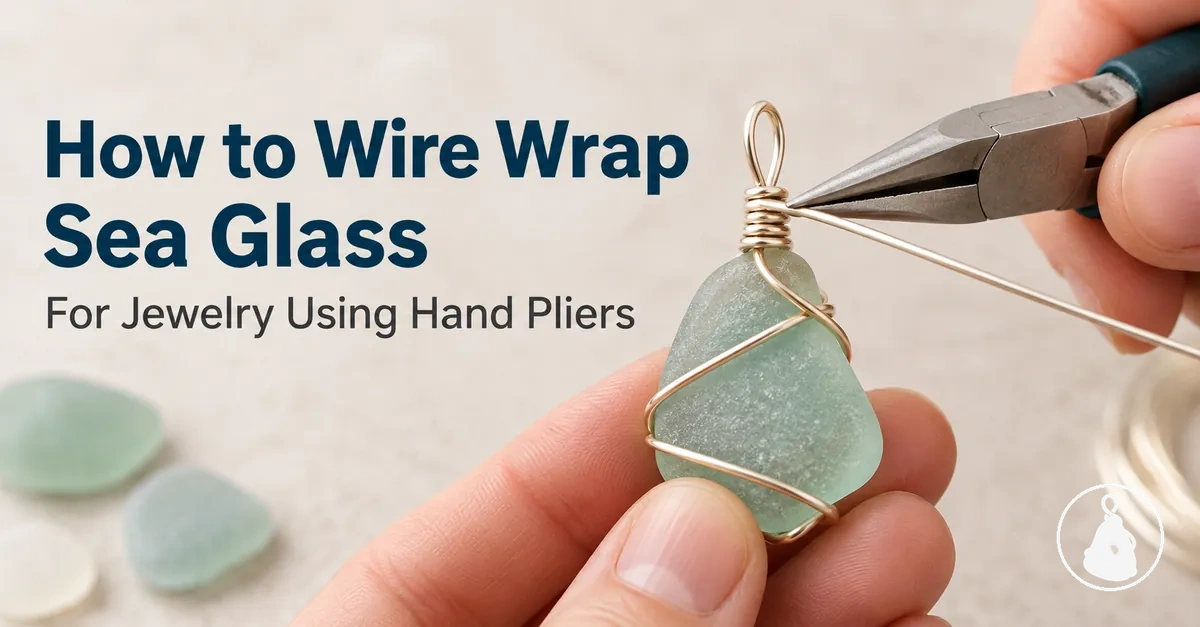
Wire wrapping secures unholed sea glass by creating stable wire contact points that capture the piece instead of merely tracing a slip-prone edge. Choose a gauge whose stiffness and workability suit the glass, build an anchor that opposes movement, tighten gradually to snug contact, then form the bail without disturbing the retained state.
Wire-wrapping control sequence
Use the sequence below to control the variables that determine whether the sea glass stays captured, stable and wearable. Each stage links to the detailed section.
Balance forming ease against the stiffness needed for the glass’s size, weight and contour.
Gauge → workability + support
Create cross-piece contact points that oppose slipping; avoid relying on a smooth edge alone.
Geometry → capture
Tighten in small stages until contact is snug, then check for rattle, rotation and edge movement.
Tension → stable seating
Keep the bail aligned, secure its base and finish the wire ends without loosening the retaining wrap.
Bail base → isolation from movement
Match the symptom to its cause: local looseness, weak capture geometry, insufficient stiffness or bail movement.
Symptom → targeted correction
The correct wire path is shape-dependent; use the checks in each stage rather than treating one wrap pattern or turn count as universal.
The exact contact pattern changes with the glass’s contour, but the controlling relationships remain consistent: gauge controls stiffness and forming ease, anchor placement controls retention, and tension controls movement. Wire wrapping is a no-hole attachment method; extra tension cannot compensate for an anchor that does not capture the shape.
Table of Contents
Choose a Wire Gauge for the Sea Glass Size and Weight
Choose the wire gauge according to sea-glass size and weight and the stiffness needed to hold the piece.
The decision balances flexibility and workability for close forming against enough structural support to keep the sea glass retained.

Wire gauge indicates thickness: higher gauge numbers mean thinner wire. Representative diameters for the sizes used here are 20 gauge ≈ 0.81 mm, 22 gauge ≈ 0.64 mm, and 24 gauge ≈ 0.51 mm.
Thinner wire is generally easier to bend, while thicker wire is generally stiffer; wire material and temper also affect workability.
Treat the table as conditional guidance for balancing forming ease and support rather than as a fixed prescription for every sea glass piece.
| Representative gauge | Thickness | Flexibility and stiffness | Sea glass condition | Structural role |
|---|---|---|---|---|
| 24 gauge | 0.51 mm | Thinner and more bendable than the 22- and 20-gauge examples | Smaller or lighter pieces where easier forming is useful | Emphasises workability where less holding stiffness is required |
| 22 gauge | 0.64 mm | Intermediate thickness between the 24- and 20-gauge examples | Pieces requiring a balance between forming ease and support | Balances workability with increased stiffness |
| 20 gauge | 0.81 mm | Thicker and stiffer than the 22- and 24-gauge examples | Larger or heavier pieces where greater holding stiffness is useful | Emphasises structural support where additional stiffness is needed |
For a smaller, lighter sea glass piece, thinner wire can make close forming easier when the piece needs less structural support; for a larger, heavier piece, thicker wire can provide more holding stiffness when the shape allows it to form securely.
Use these gauge examples as reference points, not exact size-to-gauge rules, because sea-glass shape, wire material, temper, size and weight all affect the final balance between workability and support.
Position and Anchor the Wire Around the Sea Glass
Position the anchor so the wire path captures the sea glass through stable cross-piece contact rather than simply following a slip-prone edge.
A successful anchor uses contact points that retain the glass against movement before additional wrapping begins.

Start with the prepared sea glass against the wire and choose a starting position where the wire can contact the piece without relying only on its perimeter.
Guide the wire from the back around the sides and across the front so the wire path creates a crossing point that helps capture the glass; where the shape permits, a crossing at the back can create another retaining point.
By contrast, wire running in line with a smooth edge can slip along that edge because the path does not cross the piece to oppose that direction of movement.
Use the following sequence to establish the initial anchor while matching each contact point to the shape of the sea glass.
- Position the sea glass against the wire with enough wire on each side to form the initial retaining path.
- Choose a contact point where the wire can travel from the back toward the front while remaining against the glass rather than simply tracing an edge.
- Bring the wire around the sides and cross the front of the sea glass to create a crossing point that spans the piece and helps capture it.
- Continue the wire path toward the back and form another contact or crossing point where the contour allows the wire to resist sliding.
- Check the anchor while holding the wire in position; the sea glass should remain captured between the front and back contact points rather than slide along the wire path.
A captured piece has wire crossing its face or contour at contact points that oppose movement, whereas a perimeter-tracing wire path can follow the edge and slide when the contour provides little resistance.
For irregular sea glass, adjust the anchor position locally to follow useful contours while maintaining stable contact.
Adapt the Anchor to Irregular Sea Glass Shapes
With irregular sea glass, an uneven or asymmetrical contour changes where each contact point can maintain stable contact.
A contour that gives the wire path a stable change of direction can help stabilise the anchor, while a smooth or narrowing edge can let the wire migrate and increase the risk of movement or slipping.

- At a corner, check whether the wire path changes direction against the contour instead of migrating away from the contact point.
- Where the glass narrows, reposition the contact point if the wire can migrate toward the smaller changing width.
- Along an uneven edge, place the wire where the local contour supports stable contact rather than where the wire sits loosely against the surface.
- On an asymmetrical piece, check each side separately and reposition the anchor path where movement or slipping remains possible.
Reposition the same anchor path locally when a corner or changing width shifts the useful contact area; the appropriate position depends on the contour of the individual piece.
After each adjustment, check that the wire maintains stable contact without migrating along the irregular sea glass.
Tighten the Retaining Wrap to Keep the Glass Secure
Tighten the retaining wrap progressively until the wire has snug contact with the sea glass and unwanted movement is controlled.
The goal is stable seating with enough tension to keep the glass secure without continuing to tighten once extra pressure is unnecessary.

Loose contact can allow rattling, rotation, or movement near an edge because the retaining wrap is not maintaining consistent contact with the seated glass.
Wire direction also matters: each tightening movement should draw the wire into useful contact rather than pull it away from the glass or shift its seating.
Increase tension in small stages, checking the glass after each adjustment instead of relying on a predetermined number of turns or a single tension setting.
Use this sequence to tighten while monitoring the result.
- Hold the seated sea glass steady and identify the section of the retaining wrap that still has looseness.
- Tighten that section gradually in the wire direction that draws it into snug contact with the glass.
- Check for rattling, rotation, or edge movement after the adjustment.
- Continue with another small tightening adjustment only where looseness remains.
- Stop tightening when the retaining wrap maintains firm contact and the glass remains stably seated without unnecessary pressure.
Stable seating means the glass remains secure against the retaining wrap without rattling, noticeable rotation or local looseness; visible excessive pressure is a reason to stop rather than continue tightening.
Before finishing the wrap, verify that contact, wire direction, and controlled tension maintain that stable seating by checking the following conditions.
- The sea glass remains seated when the wrap is handled gently.
- The glass does not rattle within the retaining wrap.
- There is no noticeable rotation or edge movement caused by looseness.
- The wire maintains snug contact along its intended path rather than lifting away from the glass.
- The wrap remains secure without visible excessive pressure against the sea glass.
Form the Bail and Finish the Wire Ends
Form the bail and finish the wire ends without loosening the retained sea glass.
The finished bail should align with the piece, provide usable connection space, have a secure bail base, and leave the wire ends smooth.

Shape the bail above the retained sea-glass piece and align it so the loop sits in the intended position without pulling the existing wrap out of place.
Secure the bail base so movement at the loop does not transfer into the wire holding the glass, while leaving usable connection space within the bail.
After the bail base is secure, trim excess wire close to its finishing point and tuck or smooth each exposed end so a protruding end does not create a snag point during handling.
Use the following sequence to complete the finish.
- Form the bail above the sea glass, leaving usable connection space within the loop.
- Align the bail with the retained piece and check that positioning it does not shift the wire holding the glass.
- Secure the bail base with the remaining working wire while keeping the completed retaining wrap undisturbed.
- Trim excess wire flush with its finishing point once the bail base is secure.
- Tuck the trimmed wire ends into a protected position and smooth the finish so no protruding end creates a snag point during handling.
If the bail sits off-centre
Realign it before completing the finish; trim, tuck or smooth any protruding wire end until it no longer creates a snag point.
If moving the bail shifts the glass
Correct and secure the bail base before finishing, then confirm that the retaining wrap and sea glass remain stable.
Fix Loose or Slipping Wire Wraps
If a loose or slipping wrap is moving, check capture geometry, contact points, wire stiffness and retaining tension before changing the wrap.
Diagnose which condition permits movement before choosing the corrective action.

Rattling can indicate looseness where retaining tension no longer maintains consistent contact, while rotation can indicate that the wire path does not adequately oppose movement around the glass.
Edge slippage can occur when a contact point follows a smooth or narrowing edge that allows the wire to migrate; movement can also persist when wire stiffness provides insufficient support for the piece.
Bail-induced movement indicates that movement at the bail or bail base is transferring into the retaining wrap.
Use the symptom, likely cause, check, and corrective action below to identify the proportionate correction.
| Symptom | Likely cause | Check | Corrective action |
|---|---|---|---|
| Rattling | Local looseness or insufficient retaining tension | Check whether the wire maintains snug contact while the glass is handled gently. | Retighten the loose section progressively until contact is snug and the glass remains seated. |
| Rotation | Contact points or capture geometry do not adequately oppose rotational movement | Check whether the glass rotates while the wire remains in its current path. | Reposition the relevant contact point so the wire direction better opposes the observed rotation. |
| Edge slippage | The wire direction follows a smooth or narrowing edge that permits migration | Check whether the wire slides along the edge instead of remaining at its intended contact point. | Reposition the wire across a more stable contour; rebuild the anchor if the current capture geometry cannot maintain stable contact. |
| Movement with inadequate support | Wire stiffness is insufficient to maintain the intended contact path | Check whether the wire bends away from its contact point during gentle handling. | Rebuild the affected retaining structure with wire that provides enough stiffness to maintain the required path while remaining workable for the piece. |
| Bail-induced movement | Movement at the bail or bail base transfers into the retaining wrap | Move the bail gently and check whether the retaining wrap or glass shifts with it. | Secure or reposition the bail base so its movement does not disturb the retaining wrap, then recheck stability. |
If slipping returns because the anchor follows an unstable contour or its contact points cannot oppose the observed movement, repositioning or rebuilding the anchor may be more reliable than patching fundamentally weak capture geometry.
When the anchor is basically sound and the problem is local looseness, use the targeted corrective action instead; after either correction, recheck stability and confirm that the glass does not rattle, rotate, or slip during gentle handling.