Preparing Sea Glass for Jewelry Making
Prepare sea glass for jewelry making by checking for cracks, loose chips and sharp edges; removing visible residue and drying the glass completely; smoothing only hazardous projections; and choosing whether to preserve the frosted finish or polish for more sheen. A piece is ready for the next method only when its surface is clean and dry, its edges and body are stable, and the intended working area is suitable for that specific method.
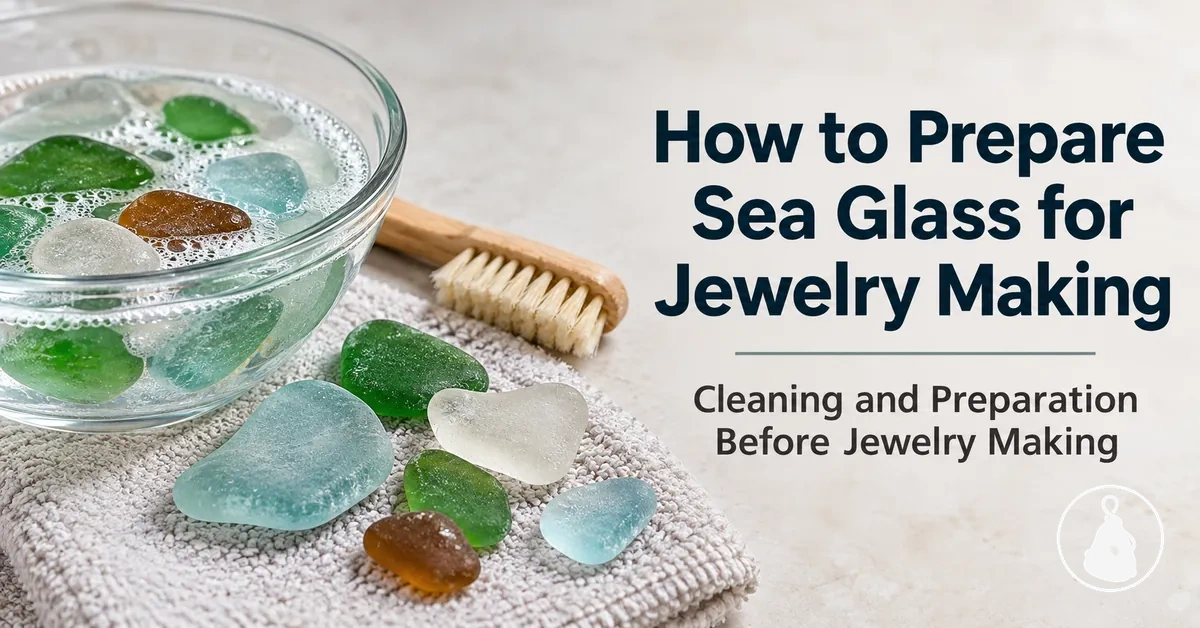
Preparation readiness path
Use these five checks in order. Each step has a clear stopping condition so preparation does not turn into unnecessary reshaping or polishing.
-
Inspect conditionProceed when there are no loose fragments or obvious structural instability. A stable edge chip may be manageable; a visible crack or unstable fracture calls for reassessment.
-
Clean and dryRinse away debris; use mild soap or soaking only when residue remains. The endpoint is no visible removable residue and a fully dry surface. Natural frosting may remain.
-
Smooth only hazardsAbrade only sharp or chipped projections with light, gradual passes. Stop when the edge is comfortable to handle and firm; stop if cracking or local breakdown appears.
-
Choose the finishPreserve frosting for the weathered look, or polish when greater sheen is the goal. Cleaning removes residue; polishing intentionally changes the surface.
-
Verify method fitConfirm a clean, dry surface; stable body and edges; no loose fragments; the chosen finish; and an intact planned working area. Then assess drilling or wire-wrapping suitability separately.
Ready means prepared, not universally compatible. A piece that passes the general checks can still require a different hole position for drilling or reassessment at a wire-contact area.
Preparation stops before drilling or wire wrapping begins; the final handoff is a separate check of the exact area the next jewelry method will use.
Table of Contents
Inspect Sea Glass for Chips, Cracks, and Sharp Edges
Inspect sea glass for each chip, crack, sharp edge, and loose fragment before continuing preparation.
A chip does not automatically make sea glass unsuitable. Judge the defect by its type, location, severity, and apparent stability: a minor stable edge defect can remain manageable, while a crack, loose fragment, or unstable fracture requires reassessment.
The practical distinction is between a manageable surface defect that can be addressed during preparation and a structural concern that later jewelry work could stress.
- Visible cracks: inspect the sea glass for a crack or fracture line that extends beyond superficial surface texture.
- Chip stability: check whether a chip leaves a firm surrounding edge or an area that appears loose or likely to break further.
- Sharpness: identify any sharp edge that is uncomfortable to handle and needs attention before preparation continues.
- Defect location: note whether the defect is confined to an outer edge or crosses an area intended for later jewelry work.
- Loose fragments: set the sea glass aside for reassessment if a fragment moves, separates, or leaves the surrounding area visibly unstable.
- Intended jewelry area: reassess the sea glass when a chip or crack affects the area that the chosen jewelry method will rely on.
A defect becomes more significant when it affects the intended working area. Keep preparing an apparently stable piece, plan to smooth a manageable sharp edge, or set the piece aside when structural stability is uncertain.
The annotated example below shows the same distinction by identifying a minor chip, a sharp edge, and a visible crack.

Do not apply a fixed defect-size threshold to every piece. Stability and location matter more than size alone, especially where a later jewelry method will contact or stress the glass.
This check covers preparation condition; choosing the original sea-glass piece is a separate selection stage.
Clean Sea Glass and Remove Surface Residue
Clean sea glass until visible debris and removable residue are gone, then rinse and dry it completely before further jewelry preparation.
The goal is a clean surface, not a glossy one. Start with clean water, add mild soap or a soak when residue remains, and target only material that can be removed from pits or irregular areas; natural frosting is part of the glass finish, not dirt.
- Rinse: rinse the sea glass with clean water until loose sand, dirt, and other visible debris are gone.
- Wash or soak if needed: use water with mild soap when residue remains after rinsing, and soak the sea glass when stubborn residue needs more contact time to loosen.
- Target remaining residue: focus cleaning on visible residue in surface pits or irregular areas and stop when that removable material is no longer visible.
- Final rinse: rinse the sea glass thoroughly with clean water until visible soap or loosened residue is gone from the surface.
- Dry completely: allow the sea glass to dry fully so rinse water no longer obscures its surface condition.
- Recheck: inspect the dry sea glass for remaining removable residue and repeat only the necessary cleaning stage if residue is still visible.
The before-and-after example shows the cleaning endpoint: removable residue is gone after cleaning and drying, while the frosted surface remains visible.

Smooth Sharp or Chipped Edges
Smooth a sharp or chipped sea-glass edge by working only the hazardous projection with gradual abrasion rather than reshaping the whole piece.
Use light pressure, keep the broader sea-worn form where practical, and check the worked edge between passes. Stop when the edge is comfortable to handle and the surrounding glass remains firm.
- Stabilize the sea glass: support the piece so the chipped edge is accessible without the glass shifting while the abrasive contacts it.
- Address the sharp area: place an abrasive pad or fine abrasive against the sharp projection or chipped edge rather than working across the entire sea-glass surface.
- Use gradual abrasion: work the local edge with light pressure, taking away material progressively instead of trying to round off the edge in one pass.
- Check repeatedly: pause between passes and check the edge condition for remaining sharpness and for firmness around the chipped area.
- Stop or reassess: stop when the local edge is comfortable to handle and remains firm; stop earlier if a crack becomes apparent or the surrounding edge begins to break down.
The before-and-after example shows the intended local change: a sharp projection becomes a smoother edge profile while the broader sea-worn shape remains recognizable.

Polish Sea Glass or Preserve Its Frosted Finish
Polishing sea glass is optional. Preserve the frosted finish when the weathered texture is part of the intended look; polish when greater sheen is more important than retaining that frosting.
The trade-off is surface alteration: as polishing increases sheen, it generally reduces the frosted appearance. The exact result still depends on the glass condition and polishing method.
| Polish the surface | Preserve the frosted finish |
|---|---|
| Desired appearance: Choose when a higher-sheen appearance is preferred. | Desired appearance: Choose when the weathered, frosted appearance is preferred. |
| Surface alteration: Intentionally changes the sea-glass surface to produce a different finish. | Surface alteration: Keeps the existing weathered surface substantially as it is after cleaning. |
| Retained frosting: Less frosting may remain as the surface takes on more sheen. | Retained frosting: The frosted finish remains the dominant visible surface condition. |
| Method variability: The resulting sheen depends on the glass condition and polishing method, so identical results should not be assumed across pieces. | Method variability: The visible result is governed mainly by the existing surface condition because intentional polishing is not part of this finish path. |
| Maintenance expectation: A particular level of sheen should not be treated as a permanent preparation-stage outcome. | Maintenance expectation: Subsequent changes in the weathered appearance belong to finished-jewelry care rather than preparation-stage polishing. |
Cleaning and polishing are different operations: cleaning removes unwanted residue, while polishing intentionally changes the surface finish. If the frosted appearance already suits the jewelry design, preserving it avoids unnecessary alteration.
The matched pieces below show the finish trade-off directly under comparable lighting and scale.

Once the finish is chosen, preparation moves to the final readiness check; later changes in appearance belong to care of the finished jewelry.
Check Prepared Sea Glass for the Intended Jewelry Method
Prepared sea glass is ready for method-specific assessment when it is clean and dry, its edges and body are stable, no loose fragments remain, the chosen finish is complete, and the planned working area has no obvious local damage.
These checks establish general preparation readiness, not compatibility with every jewelry method. If a check fails, rework or reassess the affected condition rather than automatically rejecting the piece.
- Clean surface: no visible unwanted residue remains on the sea glass.
- Dry surface: the sea glass is fully dry so its surface condition can be assessed clearly.
- Stable edges: prepared edges are comfortable to handle and show no obvious local breakdown.
- No loose fragments: no fragment moves or appears ready to separate from the surrounding glass.
- Structural stability: the body shows no obvious crack or unstable fracture that calls its condition into question.
- Intentional finish: the chosen frosted or more polished finish matches the intended preparation outcome.
- Working area: the area intended for the next jewelry method is free of obvious local damage that would require reassessment.
The planned working area is the final handoff point: a piece can look clean and attractive yet still require reassessment where drilling or wire contact would occur.

Sea Glass Condition Before Drilling
For drilling, assess the exact intended hole area: it should be clean, locally stable, and not compromised by a nearby crack, chip, vulnerable edge, or unsuitable local thickness.
There is no universal thickness or edge-distance threshold for every piece; acceptable geometry depends on the individual glass and the planned hole position.
The annotated example compares a vulnerable position with a more intact candidate area on the same piece.
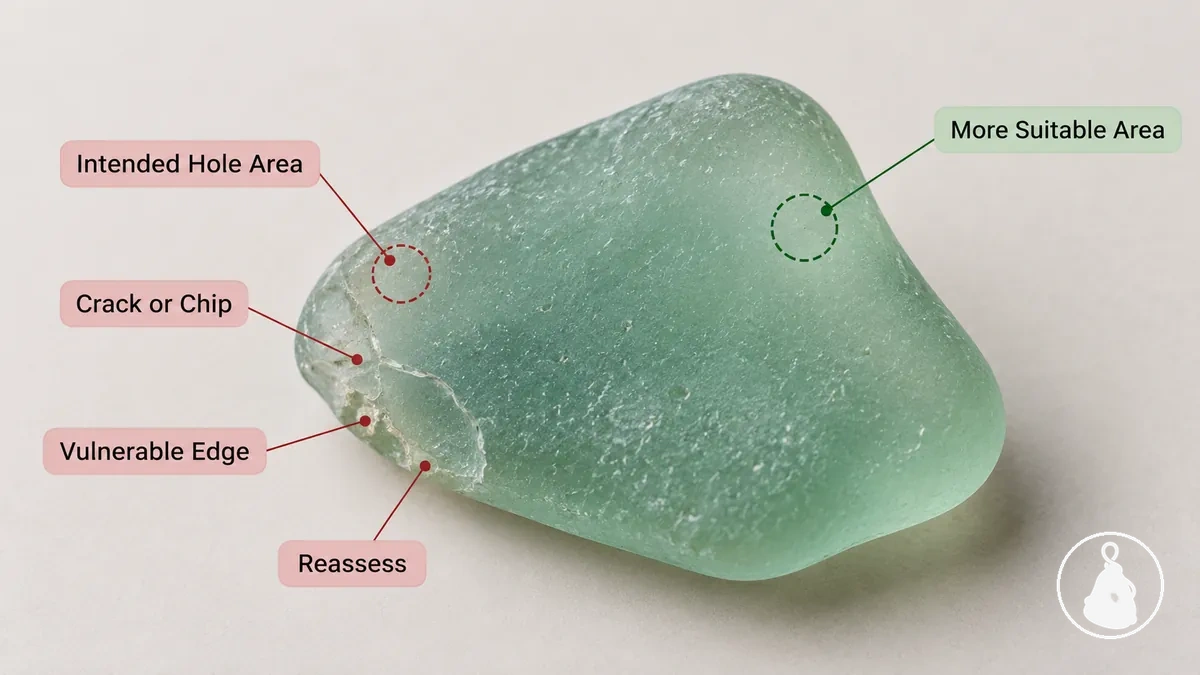
Drilling-area readiness
- Proceed to drilling assessment
- The candidate area is intact and locally stable, with sufficient thickness for that position and no obvious nearby damage.
- Reposition or reassess
- A crack, chip, vulnerable edge, or locally unsuitable thickness compromises the intended hole area.
- Threshold
- Use the condition and geometry of the individual piece; do not assume one universal edge distance or thickness value.
This check establishes readiness only; the next stage is drilling sea glass for jewelry.
Sea Glass Condition Before Wire Wrapping
Sea glass is ready to move into wire-wrapping assessment when it is clean and dry, structurally stable, and suitably smooth at the intended wire-contact areas. No single contour or finish is required for every piece.
Wire-wrapping readiness
- Proceed to wrapping assessment
- The contour is intact and stable, contact areas are smooth enough for the planned wrap, and no loose chip compromises the local surface.
- Reassess first
- A loose chip, unstable projection, local fracture, or unsuitable edge condition affects an area the wire will contact or load.
- Irregular contours
- Irregularity alone is not a failure condition; an uneven shape can remain suitable when the relevant edges and surfaces are intact and stable.
This is a condition check rather than a wrapping procedure; the next stage is wire wrapping sea glass.